Project: A Morsbag
Goals: to make a reusable shopping bag, to gain some confidence in using the machine
As mentioned previously, my next project was to make a Morsbag. I followed the instructions on the website (linked to in the last sentence) and here's what happened:

I started with this skirt I bought in Texas two summers ago. I think the last time I wore it was six months ago, which means it could be cut up and used for this.

I measured and cut out the panels for the body of the bag (keeping the side hem original to the skirt as one of the sides of the bag)...

... and cut out from the remaining bits of the skirt the handles.

I pressed the handles with my iron (with no ill-effects to my arms this time)...

... and stitched three rows of stitches to make them keep their shape.

Then I took the body of the bag and aligned the handles inside the top of it.

I then attached the handles with Ethel, first stitching across the top of the bag and then making these strong boxes over the bottoms of the handles. (The flash from my camera makes the black look grey)

Then I stitched up the bottom and the other side of the bag to close it. If you look at the handles it's plain to see that one is much shorter than the other...
 ... so I made another strong box on the length of the longer handle to try to even it up a little.
Then I turned the bag inside out and did another row of stitches around the sides (to give it strength, allegedly) and this is the final product:
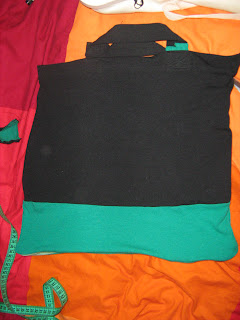
I'm going to use it as a belated birthday present for a friend of mine, since I've never finished the present I planned on giving her last year. I'm pleased with it; the skirt fabric had quite a bit of stretch to it so I'm glad this worked out.

No comments:
Post a Comment