Showing posts with label fba. Show all posts

Monday, January 31, 2011

Colette Patterns Spring Palette Challenge: #1

So, as promised, the first piece of my spring palette challenge was Simplicity 2250, a really cute and flouncy little number.

Simplicity 2250

Originally I was leaning towards view C (with the contrast) with the straps of A, but I ended up not doing the contrast so I guess it counts as view B with view A's straps. Either way, I'm quite pleased. I'm a little bit excited because I've decided to do my first ever pattern review in the way I've figured is somewhat standard in sewing blogs. Okay...

The finished dress; you can see how difficult it is to discern the darts and such

Pattern description: from envelope: "Misses' dress in two lengths, jacket and tie belt." I just did the dress, not particularly keen on the jacket (based on the drawing alone).

Sizing: 14-22, I made the 22 out of the habit of making the largest possible size since I cannot ever take accurate measurements of myself, and then altering later.

Fabric used: This lovely cotton I found at Joann's while I was in the States, which I bought 3 yards of in case I could find a project for it. 

I completely fell in love with this; after my first Simplicity dress (which I'll post about after it's done washing), which is brown with a similar blue polka dot print, this print made me want to work in a particular palette

Notions: a 30cm zipper (the pattern calls for 12'', so that's the closest I could get. It's light blue and, in theory, should be invisible).

Did it look like the photo or drawing when you were through?: Yeah, it totally does.

How were the instructions?: The bodice darts and pleats are a bit complicated, which is part of its charm, and I've only ever done very simple darts and tucks under the bust, so I was a bit nervous. The instructions were fairly clear; I didn't even try to understand what was happening with the invisible zipper instructions, but that could've been because I was nearing the end of the project and was ready to stop. There were a couple of steps where I had to sit, smoke a cigarette, and figure out what the hell was going on, but I always triumphed, and after I figured a step out the instructions and pictures made sense. I put this more to my lower level of experience than anything else.

isn't that lining pretty? I got it at Sezon ages ago (I can't remember what for) and it looks just great with this print

Construction notes: I'm still not sure how I would've tackled an FBA on this beast of a bodice; I'm lucky it ended up working out all right. The lining has princess seams, so that would've been easier, but I wasn't too bothered about getting that right. The pleat markings were a bit confusing (maybe because I briefly forgot what a pleat would look like) so I think I messed up the bodice pleats, but the skirt pleats came out fantastically. Also, I switched the two back panels by accident. Again, my fault.

I was so pleased with myself at this stage

Any changes? Yeah, as mentioned above since I didn't do an FBA the bodice hits below the bust lower than it normally would, so I only lined the front of the bodice and not the back (the pattern calls for an underlining as well as a lining proper, but I skipped that bit). I also just gathered where I wanted to, instead of how the pattern dictated, because I got all cocky.

Close-up of the bodice detailing, which, again, is a bit hard to work out because of the print

Likes/dislikes: I really liked the pattern; I think it would look better with a horizontal stripe (to show the darts and pleats better) but I love it with this fabric. Plus it was fairly easy to follow and I didn't have to change really anything.

Would you do it again? Would you recommend it? Yes and yes.

Conclusion: Anything that makes me feel nice while I'm wearing it is great, plus it's got a little bit of a Betty Draper vibe, and that's never bad. It came together easily and logically (after I used some logic, of course) and gave me confidence to work with other patterns. So I'm quite pleased!

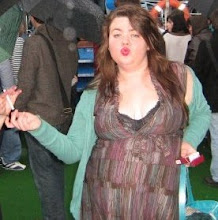
Check out that rack. No joke (also I just realized it kind of matches that wallpaper, which is ridiculous)

Thursday, July 15, 2010

Sencha Part 2

When we last left the Sencha, I was annoyed with how the shoulders fit (the sleeves felt tight), the tightness across the bust and the way it looked like a hospital gown (funny enough, someone else thought the same thing!). So I did some quick research to see if anyone had done a full bust adjustment/alteration (FBA) on the Sencha pattern and, lo and behold, someone had! AND they made a tutorial! AND it was requested by someone named Rachel! Will wonders ever cease? So here's the tutorial.

I got my supplies ready: the pattern tissue, a marker for marking, duct tape (classy!) for taping, and scrap paper for filling in the gaps (only the first two are pictured here):


Then I did the tissue-fitting, and marked the bust point (while wearing a bra this time, learned my lesson).


I also took this opprotunity to transfer from my first muslin piece of the front bodice the neckline adjustment I'd made.


Then I drew in the lines to be cut and spread...


...and cut and spread them.


Then I used the scrap paper and tape to fill in the gap of the pattern. View one:


and view two:


After that I cut another front bodice piece out of the Ikea sheet and pinned it all together to get an idea about the fitting.


A little blurry but much better. The sleeves didn't feel as ridiculous anymore, the neck looks good (I might even take a bit more out of it), and it fits better over the bust. The issue now is with the waist; the tutorial linked to above suggests taking some out of the waist, which I didn't do because, as usual, I'm paranoid about making it too small. So before doing that I decided to try the tucks on one side to see how that brought things in.


Much nicer, BUT again I wonder if I should take some more in on the waist. I think the next step (again, its way too hot in my flat and I can't work on this for extended periods... unless I bring my fan into the entry way... which I totally could and I just now realized) will be to baste (listen to me, saying such words!) the tucks in on both sides of the bodice and try it again, and figure out how much to take off the waist.

I never thought I'd spend so much time on something I can't actually wear out of the house (the fabric's too thin) but I figure if I get the muslin exactly right, I can produce numerous copies of this blouse easily and quickly. So I'm working hard on it. To leave with here's another picture of it with tucks pinned on one side (and, as an aside, I'm way more in love with tucks than with regular darts).


I think the thing I'm most pleased with is this means I can get other Colette patterns, now knowing they fit fairly well and are adorable. I might even have to got with a smaller size, but we'll see how the next phase of muslin fitting goes.

Wednesday, July 14, 2010

Sencha Part 1

I've started working on the muslin for view one of this pattern from Colette Patterns:


I'm very excited about it. I thought I might have to do a Full Bust Adjustment/Alteration (FBA) but I wasn't sure because apparently Colette Patterns are made for the curvier lass; we'll see how that turned out further down in the post.

Okay, so, first things first I cut the pattern pieces out.


This is what I'm making the muslin out of, a pink Ikea sheet which was on sale, and which is going to make splended trim for the numbers dress I'll start on once I get through with the Sencha.


Then I ironed the sheet.


After that I pinned the first pattern piece (appropriately, "A") to the sheet; in the instructions it's recommended that you use pattern weights but 1) I don't have a large enough surface and 2) I don't have pattern weights. Every time I considered buying some while I was in America all I could think was "How is it logical to buy something with the word 'weight' in it to take in your luggage?" 


I traced around it in tailor's chalk and then removed the pattern piece. Then I cut it out. Voila!


I repeated those steps with part "B," and transfered the tuck marks and button holes to the muslin.


Then I pinned it all up to get a feel for the fit of it. 


As I read in a couple reviews, the neck's a bit weird... really quite small. Also the shoulders tugged a little but I think that will be solved after I do an FBA. Yeah, I decided I probably should. Granted, the idea I got of what it looked like on is a bit skewed because I'm such a genius I didn't wear a bra (added bonus: I'm also not wearing pants!) but I feel like, with an FBA and a bra some of the stress will come off of the shoulders. 


The back fits like a dream, though, which is good. Anyway, now I have to teach myself how to do an FBA. I'm kind of excited about it though because, as a DDD girl, I'm sure I'll have to do them often in my making-things-from-patterns life. I'm taking a break from it for now though because it is so hot in my flat I was actually dripping sweat on to the muslin. Gross.