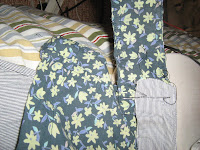
I am not, by nature, an ironer, so it was clear I had to dust off the iron and the ironing board and straighten that fabric out...

...which I kind of did. I'm not the most patient person in the world, so once it seemed fairly well ironed I was like "done." You could picture me on an aircraft carrier with a huge "Mission Accomplished" banner behind me for all I cared, I was done with ironing for the day.

Mainly because I also managed to burn myself in the 3 minutes I was working with the iron. C'est la vie, I guess.

So then I decided to sketch some stuff out, get some ideas of petal size, and I made these "patterns." I made three thick petals and three thinner petals to be alternated in the flower, much like a real tiger lily.

The time had now come to rethread Ethel (which is my machine's name, by the by) with black thread. So I got to do the one thing I'm unashamedly good at: threading bobbins. Each time I do, though, I imagine the Project Runway kids being like, "I threaded that bobbin why did you use it?"

...and I giggle because the only one I'm likely to get all pushy like that with is Pebbles (seen here sniffing around the box), who keeps sniffing around the peddle and I'm terrified she'll just hop right on it.

Ok, so I decided to do a test run of stitches on the fabric I'm using (I make that sound like it's my idea, but it's recommended fairly strongly) and one of the stitches ended up looking like this, which I was briefly disappointed by until I realized it would do for the tiger lily's spots. Improv!

Then I decided to use one of the hem stitches to sew down the middle of the petals. This may have been one of my less-good ideas; in the end, the petals look a bit busy and cluttered and I blame this step.

After doing the middle stitch on all six of the petals, I arranged them how I wanted them to look on the top. I'm still quite pleased with this arrangement, even if it's not how they ended up looking (that might almost classify as "foreshadowing").

So then I decided to make some spots on the petals before attaching them. Which can probably be counted as "misstep number 2." Talk about looking even more busy! I should've just stuck to the original plan of only using the spots to attach the petals to the top.

Alright, then I plotted out the circumference of the flower and at first I thought I was a little too generous with the dimensions (before I tried the top on). I think this came from my not having decided if I wanted the petals to overlap or be separate; looking back, I should've made a decision.

I laid out the petals on the top and was still somewhat pleased with the look of the thing, so I prompty got to stitching. I attached the ends of the petals first, so they'd have a bit of a 3D thing going on, to mimic the tiger lily's natural curling-under tendency. You can see from this picture that they are not evenly spaced; I'm gonna have to get me some tailor's chalk.

And this is how it looked, curled back on itself. I'm still feeling okay with it at this point; I feel like the little bit of purple in the middle is palatable and it looks roughly flower-like. Then I went CRAZY with the spot sewing.

Which ended up looking like this. At this point, I'm not a happy girl. My decision was to try to find some yellow fabric I don't need and sew it in the middle, star-shaped, to cover up that whole business. The problem with this genius plan? I don't own hardly anything yellow because it washes me out. So the search was on, through my old clothes pile to try find something that I could use.

The yellow problem was quickly solved, though, when I remembered I was making a tiger lily out of old skirt material with a sewing machine and I'd already taken some artistic liberties. So I made the executive decision to use bits of an old pink jumper I've got and use that in the middle. Maybe a horticulturalist will give me some gruff for not being accurate but damn them, it's a fake flower I can do what I want. As evidenced by my tone I'm STILL a little defensive about this.

I decided how big the patch should be and trimmed it...

And then sewed it on. I was pleased with how it turned out: a little homemade-looking (well, a lot homemade-looking) but the colours went well together and I was pleased with that at least.

But then I put it on and realized it looked like the flower is some sort of sea creature trying to eat my breast. But after staring at it for awhile I've decided I don't care that much, it looks nice with that skirt and it's definitely something. Also, the size is pretty good, since if it were smaller it would look a little ridiculous considering its location.
The lessons I've learned from this project are: keep things more simple and try to remember that tank tops and boobs equal stretching. BUT I don't hate it as much as I thought I would, which is fantastic.
As for my next project, I'm still not 100% confident to try the dress mod so I'm instead going to try using the button-hole feature on Ethel and modify a stripey jumper I have into a stripey cardigan.


