Showing posts with label bobbin. Show all posts

Sunday, April 25, 2010

Vaskova's Birthday Bag

Project: make a bag for a friend's birthday
Goal: make it something I'd be proud to give as a gift

So a couple of weeks ago I saw this friend/colleague of mine walking through Central School with one of those plastic bags people in Russia love to use to carry things in. I don't particularly like these, so I offered to make said friend a bag. She seemed excited so I asked some questions, like, what colours and style. She offered up grey, and when pressed to give information about a preference for a colour for lining/accenting, she decided on dark blue. Then she said she'd like something like this, a bag we got in many colours from CUP when we were choosing new course books last year:


I searched the internet for some bag patterns and really thought I'd be able to use this one, but it wasn't big enough. I loved the idea of a "choose your own" adventure bag (quotes are the authors). So I decided that since this friend of mine (we'll call her K, even though the title of this post has her name in it so I don't know why I'm being coy with the information) had explicitly stated she liked the idea of the Cambridge tote I'd make something very similar for her.

Another thing I kept in mind while planning was that K is obsessed with the Union Jack. My first plan was to make an accurate outline of the Union Jack on the front of the bag but I'm not really that into it myself, so I instead came up with a more off-centre interpretation (represented above with the help of Microsoft Paint).

These are the fabrics I chose: a grey linen for the main body of the bag and the straps, and a pretty dark blue for the lining/stripes of the Union Jack.


The pictures don't really do the blue justice. Anyway, I cut one long panel from the grey for the bag, and from the blue from the lining, and then I cut two strips for the handles from the grey and eight strips from the blue for the Union-Jackesque stripes. I also wanted to add a bow because I really really like bows.

First I made the handles; I reinforced them with some of that fusible interfacing business. It was at this stage that I became superpleased with my choice of the grey fabric. I actually fell in love with it.


Then I added the first two stripes in the front of what would be the bag; in my early stages of planning this is where I thought I'd stop with the stripes but I'm glad I didn't because it is very Finnish-flag.


Next I added the diagonal stripes, which I did a very bad job of lining up but to be honest it was not one of my main priorities so I'm telling myself that if I had thought harder about it they would've turned out more aligned.


Since I had finished adding the stripes I then took my first ever stab at lining something. I am so happy with how it turned out, too. I think I'm going to line everything from now on. Amazing.


I stitched over the tops of the sides to cover the raw edges...


...and then stitched from the inside straight down the sides to create, in essence, a sack.


Using the Cambridge bag as a guide I pinched the two bottom corners into triangles and stitched horizontally across the base of the triangles, creating a quick and easy base for the bag (which you can see here from the inside).
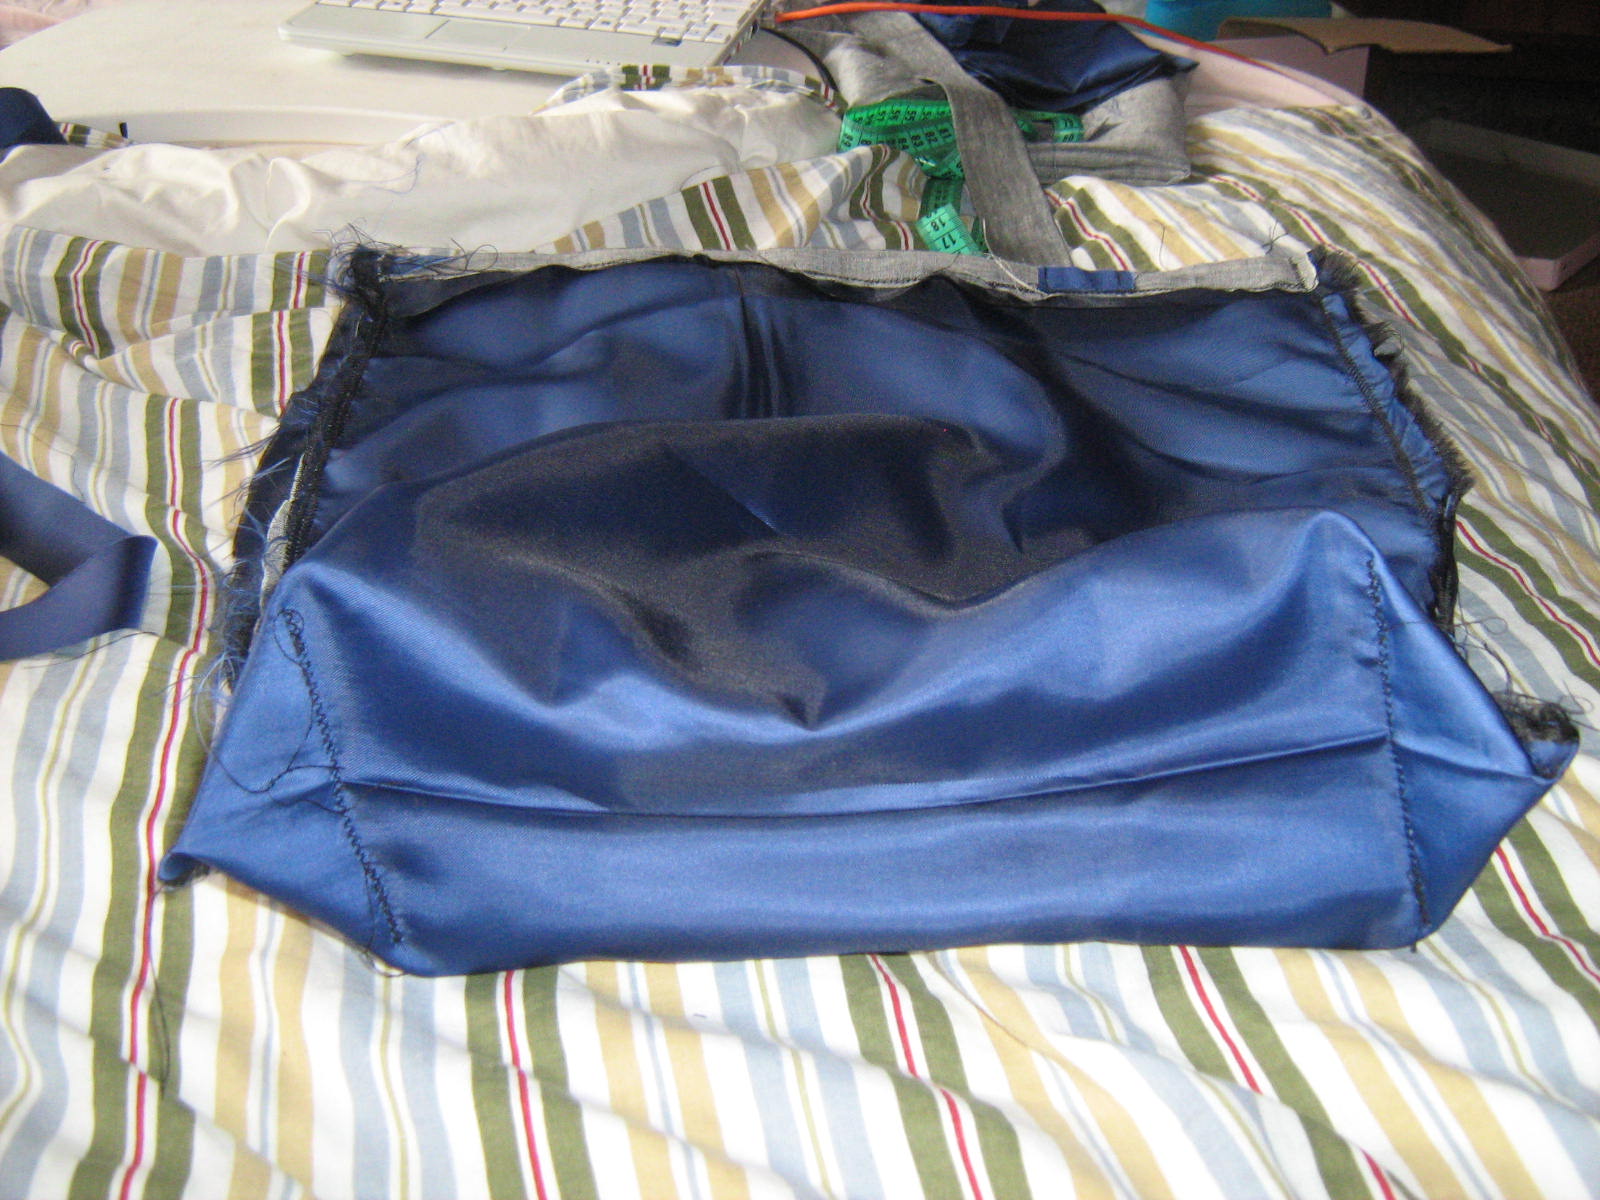

And this is how it looked on the outside after I added the handles. Adding the handles took me about an hour and a half because Ethel kept tangling the bobbin thread; after much angry searching on the internet (and changing the needle) I discovered it was actually my fault, as well as the top thread's fault, but mainly mine because I had threaded the top thread wrong.


Pretty, right? I was tempted to leave it like this but I had become obsessed with the idea of a bow. So I used this YouTube tutorial and made this one (not the prettiest, I know, but I'm such a lazy cutter; one of my goals for my trip to America this summer is to get a decent cutting board and rotary cutter):


Then I stitched the bow to the bag at the point where the stripes all meet on what I decided would be the front and voila! the bag is finished!


I LOVE it. I really hope K loves it too. The stripes are fraying a lot but I don't really mind; we'll see if she does. Here are some more pictures of it:

front


back

I think it turned out really well. It's kind of like something a trendy, subtle Dallas Cowboys fan would carry. Are there any trendy, subtle Dallas Cowboy fans? Bitchy.

Sunday, March 7, 2010

The Tiger Lily Tank

Project: The Tiger Lily Tank
Goals: have the tiger lily generally be recognizable as a flower, not to beat myself up for it looking amateurish (this is my first time, after all)

So, as mentioned in the previous post, I decided to cut bits from my skirt and add petals to the tank top. As you can see from the left, I first cut out a section of the skirt's fabric.


I am not, by nature, an ironer, so it was clear I had to dust off the iron and the ironing board and straighten that fabric out...


...which I kind of did. I'm not the most patient person in the world, so once it seemed fairly well ironed I was like "done." You could picture me on an aircraft carrier with a huge "Mission Accomplished" banner behind me for all I cared, I was done with ironing for the day.


Mainly because I also managed to burn myself in the 3 minutes I was working with the iron. C'est la vie, I guess.


So then I decided to sketch some stuff out, get some ideas of petal size, and I made these "patterns." I made three thick petals and three thinner petals to be alternated in the flower, much like a real tiger lily.


The time had now come to rethread Ethel (which is my machine's name, by the by) with black thread. So I got to do the one thing I'm unashamedly good at: threading bobbins. Each time I do, though, I imagine the Project Runway kids being like, "I threaded that bobbin why did you use it?"


...and I giggle because the only one I'm likely to get all pushy like that with is Pebbles (seen here sniffing around the box), who keeps sniffing around the peddle and I'm terrified she'll just hop right on it.


Ok, so I decided to do a test run of stitches on the fabric I'm using (I make that sound like it's my idea, but it's recommended fairly strongly) and one of the stitches ended up looking like this, which I was briefly disappointed by until I realized it would do for the tiger lily's spots. Improv!


Then I decided to use one of the hem stitches to sew down the middle of the petals. This may have been one of my less-good ideas; in the end, the petals look a bit busy and cluttered and I blame this step.


After doing the middle stitch on all six of the petals, I arranged them how I wanted them to look on the top. I'm still quite pleased with this arrangement, even if it's not how they ended up looking (that might almost classify as "foreshadowing").


So then I decided to make some spots on the petals before attaching them. Which can probably be counted as "misstep number 2." Talk about looking even more busy! I should've just stuck to the original plan of only using the spots to attach the petals to the top.


Alright, then I plotted out the circumference of the flower and at first I thought I was a little too generous with the dimensions (before I tried the top on). I think this came from my not having decided if I wanted the petals to overlap or be separate; looking back, I should've made a decision.


I laid out the petals on the top and was still somewhat pleased with the look of the thing, so I prompty got to stitching. I attached the ends of the petals first, so they'd have a bit of a 3D thing going on, to mimic the tiger lily's natural curling-under tendency. You can see from this picture that they are not evenly spaced; I'm gonna have to get me some tailor's chalk.


And this is how it looked, curled back on itself. I'm still feeling okay with it at this point; I feel like the little bit of purple in the middle is palatable and it looks roughly flower-like. Then I went CRAZY with the spot sewing.


Which ended up looking like this. At this point, I'm not a happy girl. My decision was to try to find some yellow fabric I don't need and sew it in the middle, star-shaped, to cover up that whole business. The problem with this genius plan? I don't own hardly anything yellow because it washes me out. So the search was on, through my old clothes pile to try find something that I could use.


The yellow problem was quickly solved, though, when I remembered I was making a tiger lily out of old skirt material with a sewing machine and I'd already taken some artistic liberties. So I made the executive decision to use bits of an old pink jumper I've got and use that in the middle. Maybe a horticulturalist will give me some gruff for not being accurate but damn them, it's a fake flower I can do what I want. As evidenced by my tone I'm STILL a little defensive about this.

I decided how big the patch should be and trimmed it...


And then sewed it on. I was pleased with how it turned out: a little homemade-looking (well, a lot homemade-looking) but the colours went well together and I was pleased with that at least.


But then I put it on and realized it looked like the flower is some sort of sea creature trying to eat my breast. But after staring at it for awhile I've decided I don't care that much, it looks nice with that skirt and it's definitely something. Also, the size is pretty good, since if it were smaller it would look a little ridiculous considering its location.

The lessons I've learned from this project are: keep things more simple and try to remember that tank tops and boobs equal stretching. BUT I don't hate it as much as I thought I would, which is fantastic.

As for my next project, I'm still not 100% confident to try the dress mod so I'm instead going to try using the button-hole feature on Ethel and modify a stripey jumper I have into a stripey cardigan.

Early days


After months of deliberation (and saving money) I finally purchased my sewing machine, a Brother XL-2610, which is admittedly a very basic machine. Seeing as how I'd never so much as touched a bobbin before last night, though, that is exactly what I need: simplicity. And now I have threaded a bobbin (thanks in large part to the instructional DVD that came with the machine).


I could, in theory, go into a detailed review of this guy (or you could just go here and see what other people have to say; my personal favourite is the poster who wrote about her "sowing" machine) but let's be honest: I bought this machine because it's got pink bits. The end.


I did some practice stiches, as the DVD suggested:


And then I mended a skirt of mine. Now, the thing about this skirt is, it's really supercute but also has a tendency to be a bit short. So, whenever I stand up, I tug on the back of it to pull it down, for modesty's sake. Since I clearly don't know my own superhuman strength, sometimes I rip the stitching on the gathers. So my first real project was to regather the two gathers I've split in the past (once at Heathrow Airport, which was okay though because I happened to have a safety pin on me and I could close the immodest gap which showed my underpants and once yesterday, after getitng off at Belorusskaya metro station and tugging and then hearing that horrifying "rrrrrrrrrrrip" which caused me to stand on the platform and twist the skirt around my waist to see if I was now a shabbily dressed slut; I wasn't). So I quickly made the gathers again on my machine (mine is on the left, the original is on the right), and all is well again!

My first big project is to take an old skirt I have which I never wear because it's a bit on the long side and use the fabric to make the petals of a tiger lily flower.


After that, I will attach it to a new purple tank top I bought yesterday during Shopping Spree 2010. The plan right now is to attach it by using black thread and sewing in little circles to create the spots of the flower, so the petals aren't completely attached to the top. That will probably change but we'll see.


So, to sum up, this will be a blog I use to mark my progress in sewing. I have four big projects on the horizon (not including the flower one outlined above):
1. making an amazing zipper-pencil-case like Nikki's, which I can't find a picture of on the interweb;

2. sewing a zip in my new giant TopShop bag so I can use it as a fancy-tartan-bag-style carry-on/overnight bag;


3. combining an M&S dress I bought years ago


with a skirt I bought in January so I can actually wear it without feeling like a prostitute;

4. and an apron from the rest of the bits from the skirt.


All I've got are the internet, my machine, and this book which I adore
Time to start on the flower.

PS I don't know how to format this thing so it's a bit weird, I apologize.