Showing posts with label bag. Show all posts

Sunday, April 25, 2010

Vaskova's Birthday Bag

Project: make a bag for a friend's birthday
Goal: make it something I'd be proud to give as a gift

So a couple of weeks ago I saw this friend/colleague of mine walking through Central School with one of those plastic bags people in Russia love to use to carry things in. I don't particularly like these, so I offered to make said friend a bag. She seemed excited so I asked some questions, like, what colours and style. She offered up grey, and when pressed to give information about a preference for a colour for lining/accenting, she decided on dark blue. Then she said she'd like something like this, a bag we got in many colours from CUP when we were choosing new course books last year:


I searched the internet for some bag patterns and really thought I'd be able to use this one, but it wasn't big enough. I loved the idea of a "choose your own" adventure bag (quotes are the authors). So I decided that since this friend of mine (we'll call her K, even though the title of this post has her name in it so I don't know why I'm being coy with the information) had explicitly stated she liked the idea of the Cambridge tote I'd make something very similar for her.

Another thing I kept in mind while planning was that K is obsessed with the Union Jack. My first plan was to make an accurate outline of the Union Jack on the front of the bag but I'm not really that into it myself, so I instead came up with a more off-centre interpretation (represented above with the help of Microsoft Paint).

These are the fabrics I chose: a grey linen for the main body of the bag and the straps, and a pretty dark blue for the lining/stripes of the Union Jack.


The pictures don't really do the blue justice. Anyway, I cut one long panel from the grey for the bag, and from the blue from the lining, and then I cut two strips for the handles from the grey and eight strips from the blue for the Union-Jackesque stripes. I also wanted to add a bow because I really really like bows.

First I made the handles; I reinforced them with some of that fusible interfacing business. It was at this stage that I became superpleased with my choice of the grey fabric. I actually fell in love with it.


Then I added the first two stripes in the front of what would be the bag; in my early stages of planning this is where I thought I'd stop with the stripes but I'm glad I didn't because it is very Finnish-flag.


Next I added the diagonal stripes, which I did a very bad job of lining up but to be honest it was not one of my main priorities so I'm telling myself that if I had thought harder about it they would've turned out more aligned.


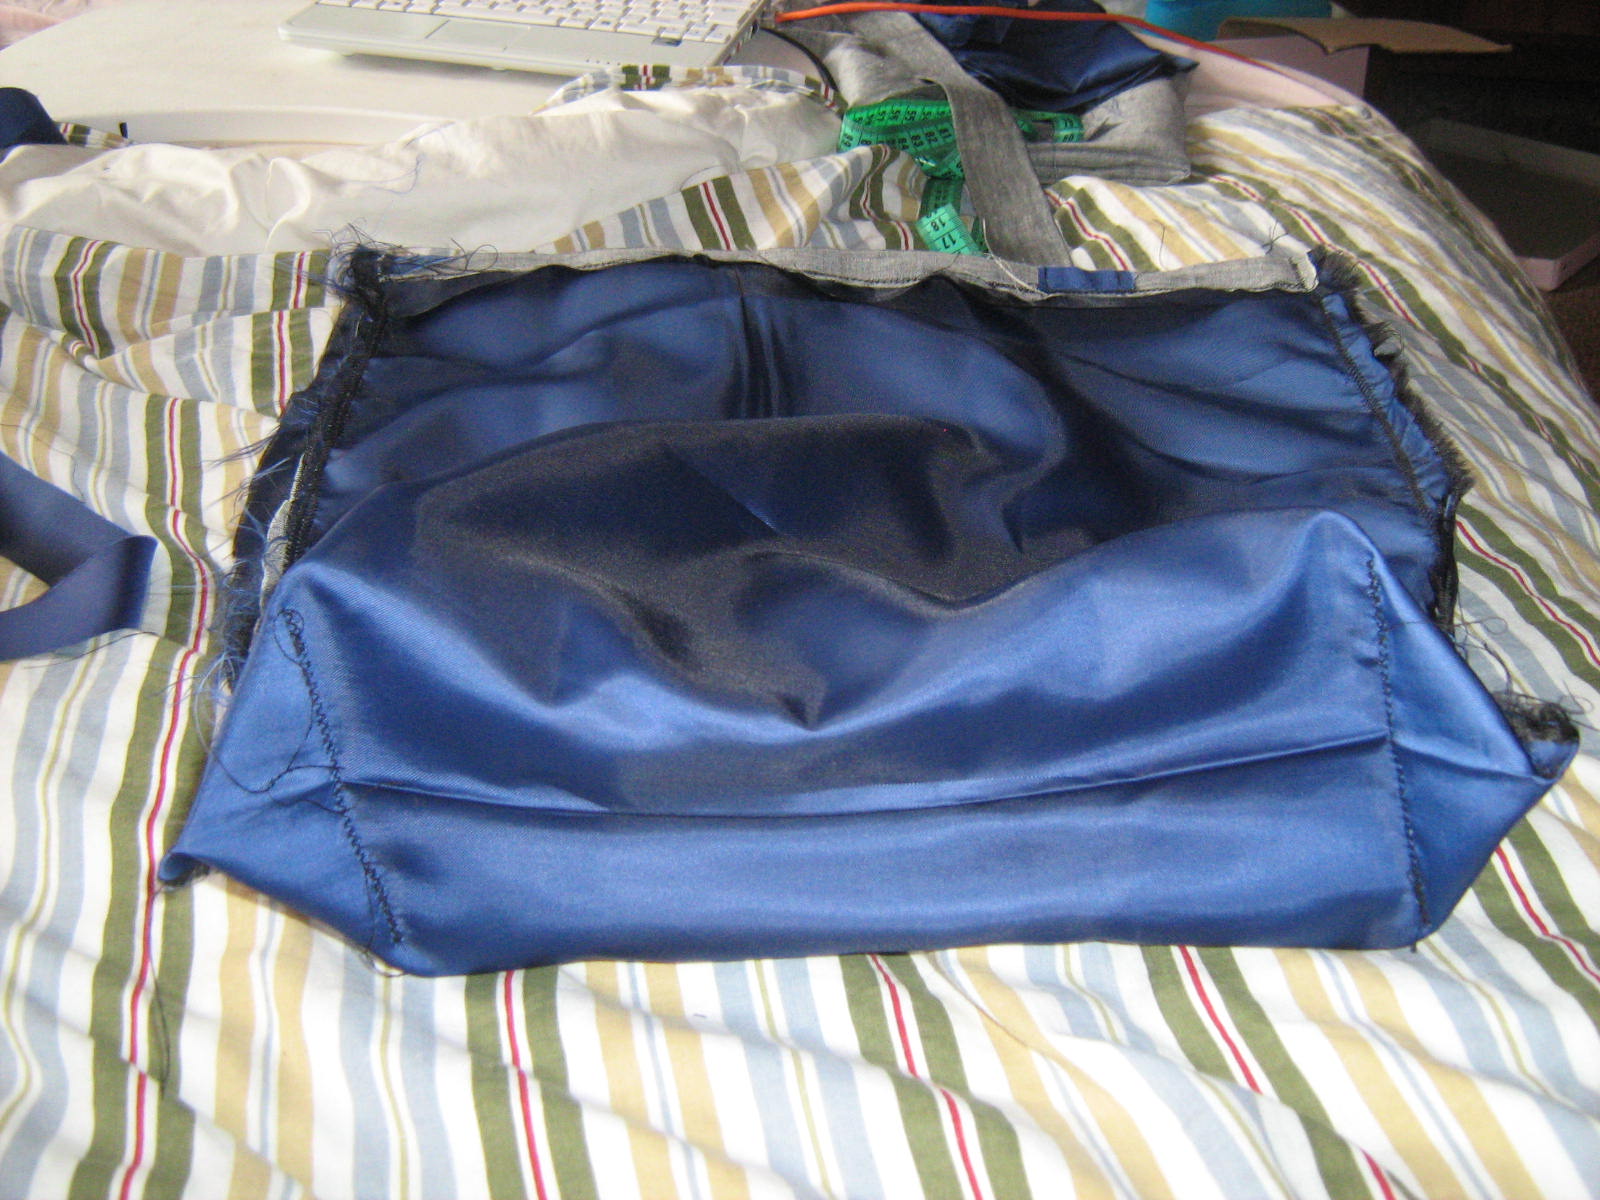
Since I had finished adding the stripes I then took my first ever stab at lining something. I am so happy with how it turned out, too. I think I'm going to line everything from now on. Amazing.


I stitched over the tops of the sides to cover the raw edges...


...and then stitched from the inside straight down the sides to create, in essence, a sack.


Using the Cambridge bag as a guide I pinched the two bottom corners into triangles and stitched horizontally across the base of the triangles, creating a quick and easy base for the bag (which you can see here from the inside).


And this is how it looked on the outside after I added the handles. Adding the handles took me about an hour and a half because Ethel kept tangling the bobbin thread; after much angry searching on the internet (and changing the needle) I discovered it was actually my fault, as well as the top thread's fault, but mainly mine because I had threaded the top thread wrong.


Pretty, right? I was tempted to leave it like this but I had become obsessed with the idea of a bow. So I used this YouTube tutorial and made this one (not the prettiest, I know, but I'm such a lazy cutter; one of my goals for my trip to America this summer is to get a decent cutting board and rotary cutter):


Then I stitched the bow to the bag at the point where the stripes all meet on what I decided would be the front and voila! the bag is finished!


I LOVE it. I really hope K loves it too. The stripes are fraying a lot but I don't really mind; we'll see if she does. Here are some more pictures of it:

front


back

I think it turned out really well. It's kind of like something a trendy, subtle Dallas Cowboys fan would carry. Are there any trendy, subtle Dallas Cowboy fans? Bitchy.

Wednesday, March 10, 2010

The Overnight Bag

Project: The Overnight Bag
Goals: install a zipper with very little fuss

Appropriately enough, the overnight bag project spanned overnight. I decided to use an old H&M top of mine (purchased in Amsterdam in 2005) which I never wear anymore because the front has a weird line, then I did all of my measuring, cutting and pinning (before I let Pebbles run around I did a careful search of the floor where she likes to run and found the prodigal pin cushion next to my fan, for some odd reason). Here's the process:

Here's the bag. It's quite large; I measured the base to get an idea of how big the zipper panels should be (55,5 cm x 14,2 cm) and then added some to even it out a bit and give me some seam allowances.


Here's the zipper I purchased, which is longer than 55,5 cm, which I was pleased about.


Here's the top I'll use for the paneling; it's very stretchy, which made it hard to work with later on and which annoyed me mildly.


I measured the panel out from the back of the top, and then I put dots at regular intervals to help me cut it out since it's so damned stretchy. I put the dots on the inside of the top, thinking I'd use the outside as what would be visible, but I realized after I had made the dots that it might be better if the colors were a bit muted. Even when I go into something planning to plan every little thing, I still make split second decisions. Annoying.


Here's the panel I made; you can see the edges are a bit jagged because I simply cannot cut in a straight line.


Then I cut the middle out of the panel all the way to the bottom hem. One thing I do always try to do is use any hem already included in the fabric I'm refashioning so I don't have to bother with it; the only flaw with this one is the hem thread is black, whereas I used white for the stitching. After that I pinned the zipper in and smoothed out any puffing that occured because of the stretchiness. Then I turned the bag inside out and started to pin the panel into it to see how it would look.

After attaching both ends of the panel I turned the bag right side out again (and pricked myself at least 12 times with all the pins) and admired my work up to that point.


I decided not to use the machine til this morning because, as I've mentioned, she's noisy, so Pebbles was able to doze peacefully while I was working. (She's pictured sleeping under the laundry drying rack, which is her favourite place to nap outside of her cage. Don't be alarmed by the red thing next to her bum; it's some piece of something, not a piece of her.)


This morning I turned the bag inside out and stitched it all in together but experienced HUGE issues with the stretchiness of the fabric.


I even changed the foot to a zipper foot, although in all honesty I'm not 100% sure what it did for me.


This is the final result. You can see that the stripes don't match up anymore, because of the damn stretchiness of it all. Next time I install a zipper I will not use such stretchy material. That said, the stitches seem to be holding up well and it does keep the top closed, which is all I really wanted.


The end of the zipper is a bit nutso and it's very difficult to get this part stitched properly with the machine, so I think I'll have to do some handstitching to get the thing not to open on itself.


Here you can see the great disparity between the two sides of the fabric. I know, though, that this is not the fault of my planning in terms of measuring because I did a damned good job. It's because of the stretchiness. So I'm not too upset. The panel on the top is the one I did second, when I started taking into account the stretchiness. I learned a lot about fabric types (i.e. don't use the rest of the shirt until I've figured out how to deal with it) so that's good. At least I'm learning things.

Sunday, March 7, 2010

Early days


After months of deliberation (and saving money) I finally purchased my sewing machine, a Brother XL-2610, which is admittedly a very basic machine. Seeing as how I'd never so much as touched a bobbin before last night, though, that is exactly what I need: simplicity. And now I have threaded a bobbin (thanks in large part to the instructional DVD that came with the machine).


I could, in theory, go into a detailed review of this guy (or you could just go here and see what other people have to say; my personal favourite is the poster who wrote about her "sowing" machine) but let's be honest: I bought this machine because it's got pink bits. The end.


I did some practice stiches, as the DVD suggested:


And then I mended a skirt of mine. Now, the thing about this skirt is, it's really supercute but also has a tendency to be a bit short. So, whenever I stand up, I tug on the back of it to pull it down, for modesty's sake. Since I clearly don't know my own superhuman strength, sometimes I rip the stitching on the gathers. So my first real project was to regather the two gathers I've split in the past (once at Heathrow Airport, which was okay though because I happened to have a safety pin on me and I could close the immodest gap which showed my underpants and once yesterday, after getitng off at Belorusskaya metro station and tugging and then hearing that horrifying "rrrrrrrrrrrip" which caused me to stand on the platform and twist the skirt around my waist to see if I was now a shabbily dressed slut; I wasn't). So I quickly made the gathers again on my machine (mine is on the left, the original is on the right), and all is well again!

My first big project is to take an old skirt I have which I never wear because it's a bit on the long side and use the fabric to make the petals of a tiger lily flower.


After that, I will attach it to a new purple tank top I bought yesterday during Shopping Spree 2010. The plan right now is to attach it by using black thread and sewing in little circles to create the spots of the flower, so the petals aren't completely attached to the top. That will probably change but we'll see.


So, to sum up, this will be a blog I use to mark my progress in sewing. I have four big projects on the horizon (not including the flower one outlined above):
1. making an amazing zipper-pencil-case like Nikki's, which I can't find a picture of on the interweb;

2. sewing a zip in my new giant TopShop bag so I can use it as a fancy-tartan-bag-style carry-on/overnight bag;


3. combining an M&S dress I bought years ago


with a skirt I bought in January so I can actually wear it without feeling like a prostitute;

4. and an apron from the rest of the bits from the skirt.


All I've got are the internet, my machine, and this book which I adore
Time to start on the flower.

PS I don't know how to format this thing so it's a bit weird, I apologize.